Learn to a ride a motorcycle #101
Vehicle control is key, so once you are confident in controlling the vehicle you will unlock a new sense of freedom.
When learning to ride a motorcycle, most new riders progress through two early stages:
Stage 1. Everything is new. Your first priority is learning the motorcycle's basic controls and developing enough confidence to start, stop and turn safely.
Stage 2. Once you understand the controls and can confidently start, stop and make basic turns, you can begin adding road rules, signalling, road positioning, observation and safety head checks as you prepare for your learner licence.
This guide focuses entirely on Stage 1 — learning to control a motorcycle from scratch.
BEFORE YOU START
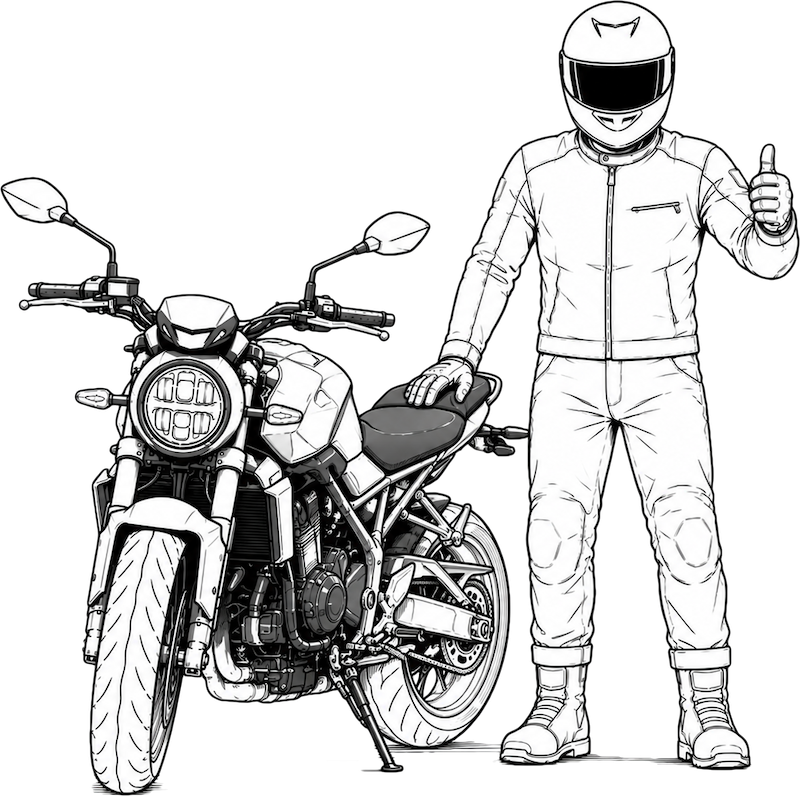
Helmet ✓
Gloves ✓
Covered footwear ✓
Flat, open practice area ✓
Motorcycle suitable for the learner ✓
And I'd seriously consider long trousers and protective clothing too.
Practice for about 30 minutes → stop → drink some water → take a 10-minute break → reassess how you're feeling.
Don't try to complete this guide in one training session.
We'll break the process into small, manageable steps until you have enough basic motorcycle control to begin practising the additional skills required for your learner licence assessment.
① Controls → ② Balance → ③ Feel controls → ④ Clutch → ⑤ Turning → ⑥ Gears
Tired riders make more mistakes. Don't rush the learning process.
- Learn to relax your hands, relax your arms so the elbows have a slight bend in them, use your legs to hold on to the motorcycle tank or body work.
- Stiff arms and death grips = Tired and sore bodies and possible headaches. You have to relax the body to ride with ease.
1. Motorcycle control layout
Anywhere in the world you will find a typical motorcycle that was made within the last 20 years has the same physical controls layout.
- The left side of the motorcycle is for clutch and gears.
- The right side is for throttle and brakes.
You are either braking or accelerating on the right side controls or you are changing gears on the left side controls, all functions work together in harmony and that is what you are going to learn!
Left side handlebar grip
The clutch lever.
Left foot
Gear shift lever and left foot rest.
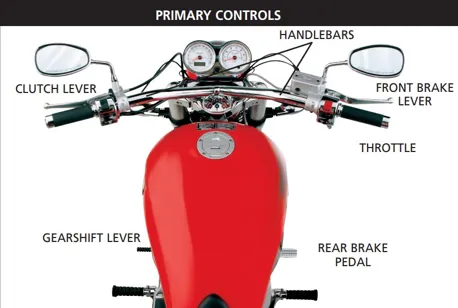
Right side handlebar grip
The throttle tube and the front brake lever.
Right foot
The rear brake pedal and foot rest.
Note for new riders
Until a rider understands how to stop and corner safely don't worry about changing gears just yet.
Beginner riders will only be using 1st gear.
Once you are ready to progress further, then 2nd gear would be introduced.
For the purpose of learning how to ride the motorcycle, this guide will not detail how ignition, clocks, or the switch gear operates. (Read the owners manual for in-depth detail!)
The gearbox operation
Most motorcycles gears will be in this order and starting from the most bottom gear lever position is 1st gear.
- 5th
- 4th
- 3rd
- 2nd
- Neutral (a half click between gears 1st and 2nd)
- 1st (Most bottom position)
2. Sitting on the motorcycle, engine off
How you get on the motorcycle is up to you.
Standing beside the motorcycle on the left side, grab the handlebar grips with your hands - The two most common methods of mounting the motorcycle are:
- Lift your right leg over the seat and mount the motorcycle;
- Stand on the left foot peg with your left foot, and then get your right leg over the seat .
Once on the motorcycle, assuming you have a learner friendly motorcycle underneath you, both feet should touch the ground.
Raise the side stand
While holding the handle bar grips, retract or raise the side stand with your left leg and then balance the motorcycle between both legs.
Balancing the motorcycle while stationary
You can start to tip the motorcycle a little bit to the left and back to the right while holding the handlebar grips.
You are trying to get a feel for the weight shift side to side underneath you while stationary, use your inner thighs or knees to grip the motorcycle bodywork for added control.
Do this incrementally more by tipping left and right until you find a limit to your own comfort pulling the bike back to it’s centre balance each time.
Fact: When a motorcycle is correctly used you will not need to lift or manage the weight of this vehicle while the vehicle is moving forward under engine (motive) power.
What we’re showing here is how that stationary weight feels like now, at some point you will need to park a motorcycle and this way you know how to handle the motorcycle to keep it upright!
This weight actually becomes five (5) times worse when we don’t follow instruction later on when doing slow speeds tasks once you are learning to start, stop and turn a motorcycle.
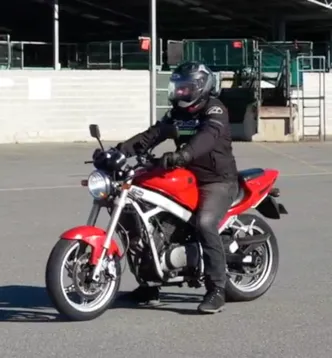
3. Feel the controls, engine off
Time to feel the controls and how they interact with you as the rider
- This time sit on the motorcycle with the side stand down on the ground;
- Put the balls of your feet up on the foot pegs and be holding the handlebar with two hands;
- Practice the left side controls separate from the right side controls.
Left Foot
The ball of your left foot should resting on the foot peg and then it is lifted slightly to reach forward and under the gear lever to either lift up or to push down the gear lever.
Put your foot back on the foot peg when not using the gear lever!
Left hand handlebar grip
The only control job for the left hand is using the clutch lever, so when gears need to changing or the motorcycle is about to a come to a complete stop.
Only when we need to use the clutch should the left hand fingers reach out from the handlebar grip position to grab and pull in the clutch lever to dis engage engine power to the rear wheel.
Idle hands/fingers important notice
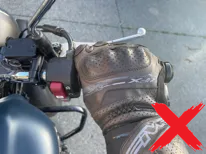
If you are not braking, or changing gears - keep your hands on the handlebar grips at all times!
Note for cyclists and scooter riders
Rider habits from bicycles and scooters can create a situation where a unsafe operation of the motorcycle may occur. Coming to motorcycling are more prone to leaving idle fingers on handlebar control levers.
Read more, bicycles vs motorcycle differences: https://motobasics.nz/knowledgebase-articles/references/q-a-bicycle-vs-motorcycle-differences/
Right Foot
The ball of your right foot should resting on the foot peg and then it is lifted slightly to reach forward and push down on the rear brake foot lever using your toes/ball of foot.
Put your foot back on the foot peg once brake action completes every time.
We do not want a bad habit of dragging the rear brake lever by not putting your foot back on the foot peg when the rear brake lever is not in use!
Right hand handlebar grip
This right hand grip contains the throttle tube and in front of the throttle is the front brake lever.
While learning these first control exercises, keep your fingers around the grips until you intentionally need a lever. You hold the right throttle grip gently to so you can use the throttle effectively.
Only when you need to brake, we will then roll the throttle tube naturally forward towards to the brake lever as then will we reach our fingers out to pull the brake lever in.
Doing so reduces the engine power and allows you to brake more effectively.
3a Controls, special note on the throttle control
Much of the motorcycle’s stability and control “feel” can only be enabled by managing the throttle smoothly.
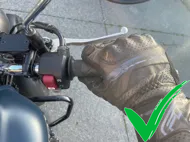
How to hold throttle grip?
Hold the throttle gently.
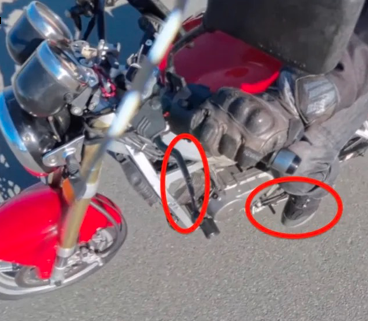
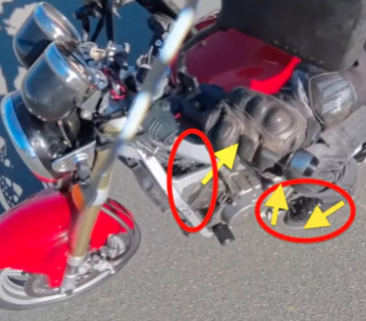
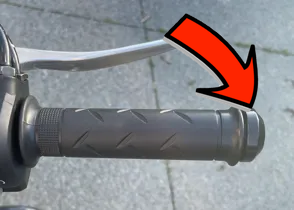
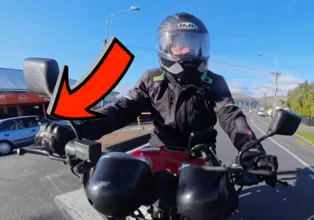
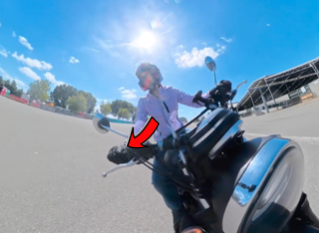
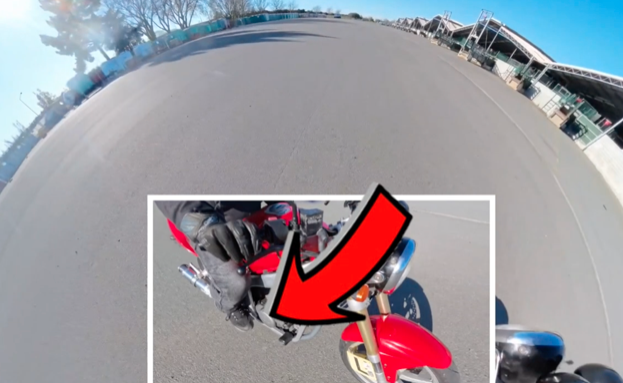
Lightly using the fixed bar end gives your hand a stable reference and can help prevent large accidental throttle movements.
How?
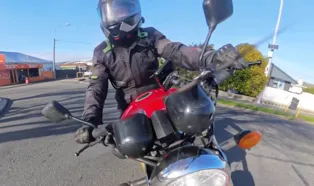
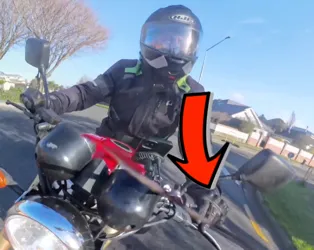
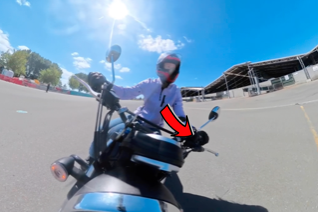
Use little pinky finger and the palm of your hand together to lightly pinch the handlebar bar end (picture 1).
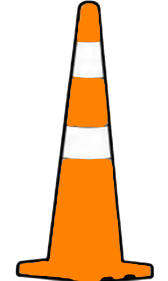
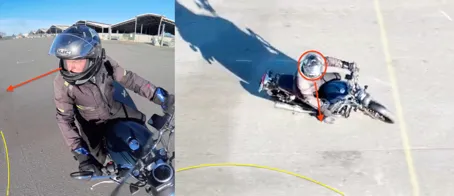
This feels a little like holding a ice cream cone side ways. (See image 3)
If you think about a toothpaste container, if you feel like you could squeeze all the toothpaste out in one hit your holding the grip too firmly.
You only want a relaxed and controlled grip when holding the handle bar grips.
Why does this work?
The bar end does not (and should not) freely rotate like the throttle grip does so by lightly pinching the bar end lightly, it allows you to add or remove throttle smoothly without excessive or reactive hand movement as you are generating a resistive movement instead of free movement.
How you hold the throttle makes all the difference, you can be smooth and steady using the bar end for control instead of rough and reactive throttle control which can be disastrous to yourself and others.
The more tired your brain is when learning, the more likely you are to make mistakes and the bar end pinch method helps slow down tired rider throttle actions.
Unlike a car, motorcycle acceleration is more sensitive at low speed so best we control the throttle with this simple grip technique!
3b Safety switches
Most motorcycles have a few safety switches to stop the motorcycle engine from running.
Side stand down safety switch
Unless the gearbox is in the neutral position you cannot start the engine with the side stand in the down position.
Clutch safety switch
If the motorcycle is in gear when starting the engine and the side stand is in the up position, you need to pull the clutch lever towards you to allow the engine to start. (ie stalled or starting engine up in 1st gear, side stand up)
Engine kill switch
If the motorcycle engine kill switch is used, the engine will not start until the switch is put back into the “run” position,
Tip sensor switch
If the engine was running and the motorcycle tips over (rider error, accident etc) the engine will turn off and you cannot start the engine again until you turn off the motorcycle using the ignition key and then turn the ignition back on and then you can re-start the engine.
It may take a few times to start a engine that has tipped over especially on older motorcycles due to the fuelling method. Fuel may spill from the motorcycle fuel tank also when the motorcycle is tipped over, that is normal.
3c Braking, how to stop
When you need to come to a complete stop
- Pull in both the clutch lever and the front brake lever at the same time while you are in a straight path of travel.
- Put feet down when stopped.
Front brakes do 85% of all effective braking when stopping, rear brake should be used with the front brake so you create good rider habits early on and where possible put the left foot down at complete stops leaving the right foot on rear brake foot lever.
This one habit will help later on when doing hill starts and more advance control scenarios.
4. Using the clutch, engine on
Time to start using the clutch, sitting on the bike and start motorcycle engine with the gearbox in neutral position.
Once the engine is warmed up for 30 seconds, time to practice.
Three items to learn about the clutch
4a. Stalling on purpose
Get used to how it stalling feels.
4b. Finding the friction zone
Feel the clutch begin to grip and then stop.
4c. Using the friction zone, then completely engage the clutch
Feel the friction zone and then committing to move forward.
Note stage 4c means practising brakes, stopping upright and motorcycle balance. We’re only talking about moving a few metres at a time for this early learning stage.
The whole point of this method is to incrementally develop good handling skills and build trust in your new throttle, brakes and clutch control.
4a Using the clutch, stalling on purpose
Follow instructions!
With the engine running and gearbox in neutral
Side stand up, both feet down and both hands holding the handlebar grips left and right, now pull and hold the clutch lever in towards the handlebar.
Put the motorcycle into 1st gear
Using the left foot while holding the clutch lever in, put the motorcycle into gear while you are steadying the motorcycle upright but a little more to the right using your the right foot to balance the motorcycle.
Once in gear, have both feet on the ground for the next task.
No throttle added, engine only idling - let the clutch lever go quickly!
The motorcycle will shunt forward a few centimetres and the engine will stall on the spot.
Repeat this stalling task a few times, get used to that stall feeling
Once you know how it feels when you stall, you can be less nervous on that item and focus on the next stage 4b “Finding the friction zone” in a controlled manner. This teaches you to not rush the clutch lever action for any reason when learning to ride a motorcycle.
However, if for some reason you feel the need to add lots of throttle and release the clutch quickly, you will have caused a "whiskey throttle" event and damaged something, either yourself or the motorcycle.
Best to avoid this whiskey throttle scenario and follow instructions at all times.
4b Using the clutch, finding the friction zone
Get motorcycle ready as previously done in 4a
Engine on, gearbox in 1st, ready on both feet.
Discovering the friction zone
No throttle added, engine only idling without added throttle, then let the clutch lever out very slowly until you feel or hear the engine speed start to slow down a little more than before and then pull the clutch back toward the handlebar grip before stalling the engine.
The motorcycle will start to feel like it will move but it won’t, if you let out the clutch to far and quickly it will stall again (4a).
Repeat this friction zone feel, get used to that feeling
Once you know how it feels when it is not stalling but feels “grabby” then you understand where that friction zone begins.
Move the motorcycle forward a little bit using the friction zone
Now add a small amount of throttle, the engine will now be above idle but not much more than this.
Let the clutch lever out very slowly until your feel the engine start to slow down a little and inch the actual motorcycle forward a little bit and then pull the clutch back toward the handlebar grip.
The motorcycle will start move and it will move slowly but it won’t move forward to much, if you let out the clutch to fast it will stall again.
Pull the clutch lever towards the handlebar grip and come to a complete stop using the front brake lever.
What you are feeling is the friction zone, we use this to engage the motorcycle engine to the rear wheel.
Handy tip: Try using only two fingers instead of using four fingers on the clutch lever, you will find you have more sensitivity to feel the clutch’s friction zone when using two fingers.
4c Using the clutch, commit to moving forward
Read the specific guide to prevent stalling a motorcycle: https://motobasics.nz/knowledgebase-articles/guides/guide-prevent-stalling
Get motorcycle ready as previously done in 4a
Engine on, gearbox in 1st, ready on both feet.
Commit to moving forward for a few metres, use the friction zone with a set amount of throttle.
Small amount of throttle is added, engine is now above idle speed.
Do not change this throttle position, keep as-is, doing this removes the need for the new rider to manage throttle position and clutch at the same time when learning these new controls.
Let the clutch lever out very slowly until your feel the engine start to slow down a little more than before but as the motorcycle has not stalled due to the throttle position used, you can now choose to commit to moving forward using the friction zone for a few metres using the friction zone or choose to stop by pulling the clutch back in and use the front brake so you can re-focus and retry.
Once you commit to moving forward past the clutch friction zone
- You do not need to add more throttle once moving forward, leave it as-is - Adding more throttle now could create a bad outcome for any beginner rider.
- Release the clutch lever smoothly past the friction zone once you are effectively moving forward a metre or so under engine power and put all fingers back onto the handlebar grips. Using the friction zone for a metre of travel helps to move the weight of the motorcycle from a stationary position without stalling.
- Put both feet up on the foot pegs.
- After a few metres have passed with clutch fully engaged, reach fingers out and pull the clutch lever towards the handlebar grip to dis-engage the engine power and simultaneously roll off the throttle position held and pull in the front brake lever to stop the motorcycle and both feet on the ground once stopped.
Repeat this process over and over
Until you are comfortable starting and stopping the motorcycle and your feet are on the foot pegs every time when moving forward for a few metres at a time, repeat this stage till mastered.
- Add and hold a small amount of throttle so not idling, just enough power to prevent the engine stalling when you add the clutch’s friction zone.
- Use the clutch friction zone to start moving the motorcycle forward, once the motorcycle is moving forward a metre, then smoothly release the clutch completely past the friction zone and put your fingers back on the handlebar grip.
- Put both feet up on the foot pegs once moving forward.
- Stop the motorcycle 3-5 metres further on using your brakes and pulling the clutch lever towards the handlebar grip, put your feet on ground only once stopped - Not before stopping!
- Repeat!
5. Turning a motorcycle
At this stage you haven't really developed a sense of how to reliably turn a motorcycle while moving, so lets start turning a motorcycle.
Specific guide for turning a motorcycle
Read more: https://motobasics.nz/knowledgebase-articles/guides/guide-motorcycle-steering
5a Slow weave or zig zag side to side
Riding from the road’s left side ride straight then move to the right side of the road, ride straight, then move back to the left side and ride straight and repeat.
5b Complete u-turn
It is actually the same as 5a, but you are just making a longer manoeuvre to complete 180 degree u-turn.
5c Circles
Same as 5b, but a continuous corner!
Important Note
While learning to corner or turn a motorcycle, do not speed up aggressively during any turn but additionally, do not remove throttle or use the clutch until you have completed the manoeuvre.
Consistent and smooth throttle control is vital for stable cornering on two wheels!
You should now know the minimum speed the motorcycle prefers from your stop start practices while under engine power without being wobbly, feeling vague and not have any engine chugging or bunny hopping.
This speed is normally around 8-10kph with clutch fully engaged and fingers on handlebar grips when using a learner friendly motorcycle.
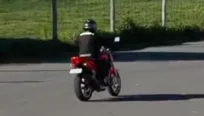
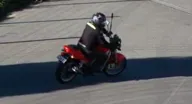
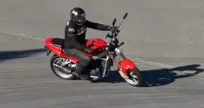
Fact: You will not feel any weight of the motorcycle when turning as instructed unless you do any of the the following items:
- If you roll off the throttle mid corner. The motorcycle will suddenly tip into the corner, new riders over compensate with sudden throttle input or drops the motorcycle;
- Using the clutch mid corner like a brake lever on a bicycle or scooter. The motorcycle will feel vague and suddenly tip into the turn (not in control), the motorcycle may possible fall on its side and some new riders may try and lift the motorcycle as a reaction to the feeling of uncontrolled tipping but unknowingly adds more throttle and clutch release creating another side effect. (whiskey throttle!);
- Using front brake aggressively mid corner. The motorcycle will overshoot the turn, motorcycle will stand up straight under aggressive braking;
- Attempting to come to a full stop during any turn before riding the motorcycle upright and straight ahead. Simply slowing while a motorcycle is leaning with any speed will slow till it falls on its side.
You must set your speed before turning and keep speed as-is during the turn.
With one speed set around 8-10km/h for your initial learning to steer a motorcycle, the process will be easier to understand as consistency helps understand the cause (turning) and the effective results.
Look where you need to go
Actually turn your head and look at the destination you are riding to, not down at the area just ahead of the front wheel. Not looking correctly can lead to a widened turning radius and possibly other rider over reactions when near other objects (Fences, vehicles, buildings etc)
When you want to turn right
Introduce the right side of the tyre for a right corner to the moving road by adding steering input momentarily with any of these actions:
- Pushing the right handle bar grip forward - Easiest to remember;
- Pulling the left handle bar grip towards you;
- Both, push the right grip and pull the left grip at the same time.
The front wheel turns left for a moment and that then enables the motorcycle to corner right as it is then using the right tyre side to corner correctly soon after this steering input.
When you want to turn left
Introduce the left side of the tyre for a left corner to the moving road by adding steering input momentarily with any of these actions:
- Pushing the left handle bar grip forward - Easiest to remember;
- Pulling the right handle bar grip towards you;
- Both, push the left grip and pull the right grip at the same time.
The front wheel turns right for a moment and that then enables the motorcycle to corner left as it is then using the left tyre side to corner correctly soon after this steering input.
Note: When you enter any turn, your engine speed should not be so low in the engine rev range where the engine is nearly "chugging" (almost bunny hopping for the car owners analogy) otherwise the bike’s engine might push you through a corner faster than you expect.
We are not adding more throttle during any corner but we are being smooth within the usable part of the engine rev range.
5a Slow weave or zig zag side to side
Moving in a straight line at a safe stable speed
Riding at a low stable speed say 10kph on the left side of the road we want to move to the other side of the road (ie heading south, but move to the other side of the road but still heading south)
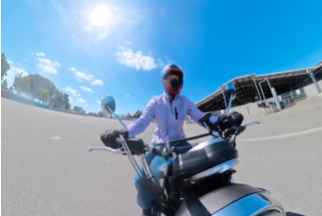
Steer to the other side of the road
While moving forward, push the right handlebar grip gently to initiate a right turn until the direction of travel is changed.
As you near the right side of the road, push on the left handlebar grip until the direction of travel has straightened up.
Steer to the other side of the road
While moving forward, push the left handlebar grip gently to initiate a left turn until the direction of travel is changed.
As you near the left side of the road, push on the right handlebar grip until the direction of travel has straightened up again.
This is a basic weave or zig-zag pattern

5b Complete a u-turn
Once you are confident in weaving side to side…
Complete a u-turn
Moving in a straight line at a safe stable speed say 10kph, we want to complete a right hand u-turn. (ie heading south, but we need to go north)
While moving forward in a straight line
Push the right handlebar grip gently until the direction of travel changed and then relax your handlebar input until the direction of travel completed a full 180 degrees for a u-turn.
To straighten up once u-turn has completed
Push the left handlebar grip to stop the right turn manoeuvre and then travel straight. At no point should you add or remove speed during the manoeuvre.
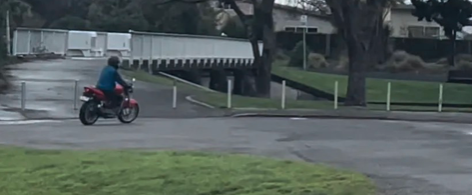
Once the motorcycle is moving at a stable speed under smooth engine power, it becomes much easier to balance than when stationary. You should no longer feel as though you're physically holding up the motorcycle's weight.
It is only when you aggressively change speed, dis-engage engine power or panic brake mid way through a corner task is when things will go wrong for new and novice riders.
Poor road surface can contribute beyond the learner environment but typically it is incorrect rider control inputs that makes a mess of things.
Set your speed before entering a corner or turning manoeuvre and by understanding how to make the motorcycle enter a corner (aka turning) via handlebar inputs and completing to the task - Everything will work out as expected, you will turn the motorcycle with style.
This is a basic u-turn
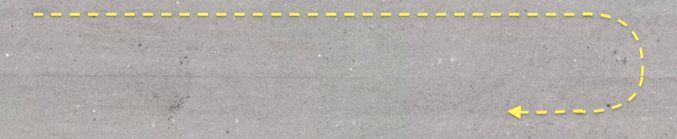
5c Complete circles
Once you are confident in completing u-turns…
Circles are just longer u-turns
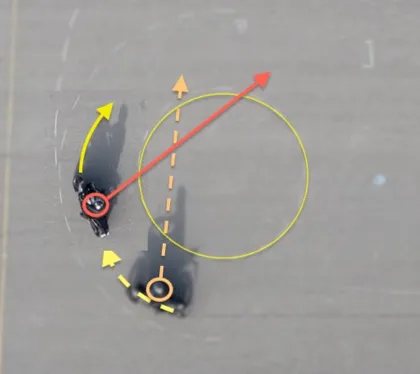
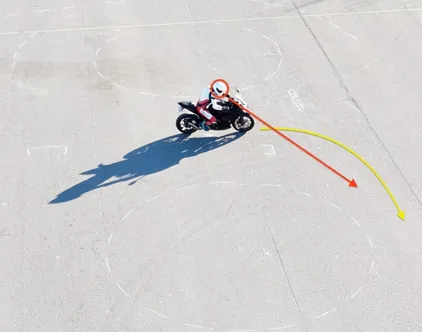
You need to be looking around with your head about 45-90 degrees ahead of where your motorcycle is facing to keep the circle radius.
As soon as you look at the road in front of you, your circle will run wide.
For these beginner exercises, straighten the motorcycle and bring it upright before coming to a complete stop.
Do not add more speed during any turning manoeuvre
You turn radius will run wider when more speed is introduced and then other issues arise like panic braking as a result of over-shooting your intended turning path.
Practice with one speed set before the corner. As you get better, you might get a little faster but it is still one consistent speed though the corner or manoeuvre regardless of how good you are!
Practice circles in both directions of travel, left and right.
Fact: “Counter-steering” is the term for introducing the correct tyre side needed to start a corner or steering manoeuvre. Using body weight to try and lean the motorcycle is not an effective method when turning a motorcycle (Especially on public streets at higher speeds!).
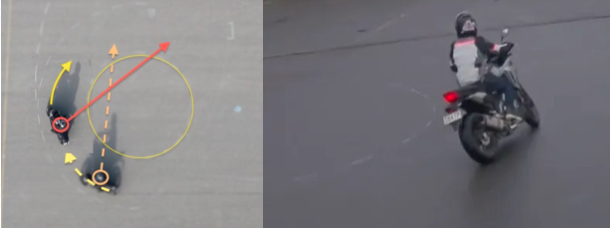
5d Supplementary, looking where you need to go!
Once you have a basic understanding of how to turn a motorcycle, you will know not to drastically change your speed through any turn to make it better and smoother. Consistency wins!
Specific guide about the vanishing point: https://motobasics.nz/knowledgebase-articles/guides/guide-vanishing-point
With your newly established motorcycle control taking a positive form, you can focus on looking further ahead and gain smoother control of the motorcycle which further improves your cornering and effective learning.
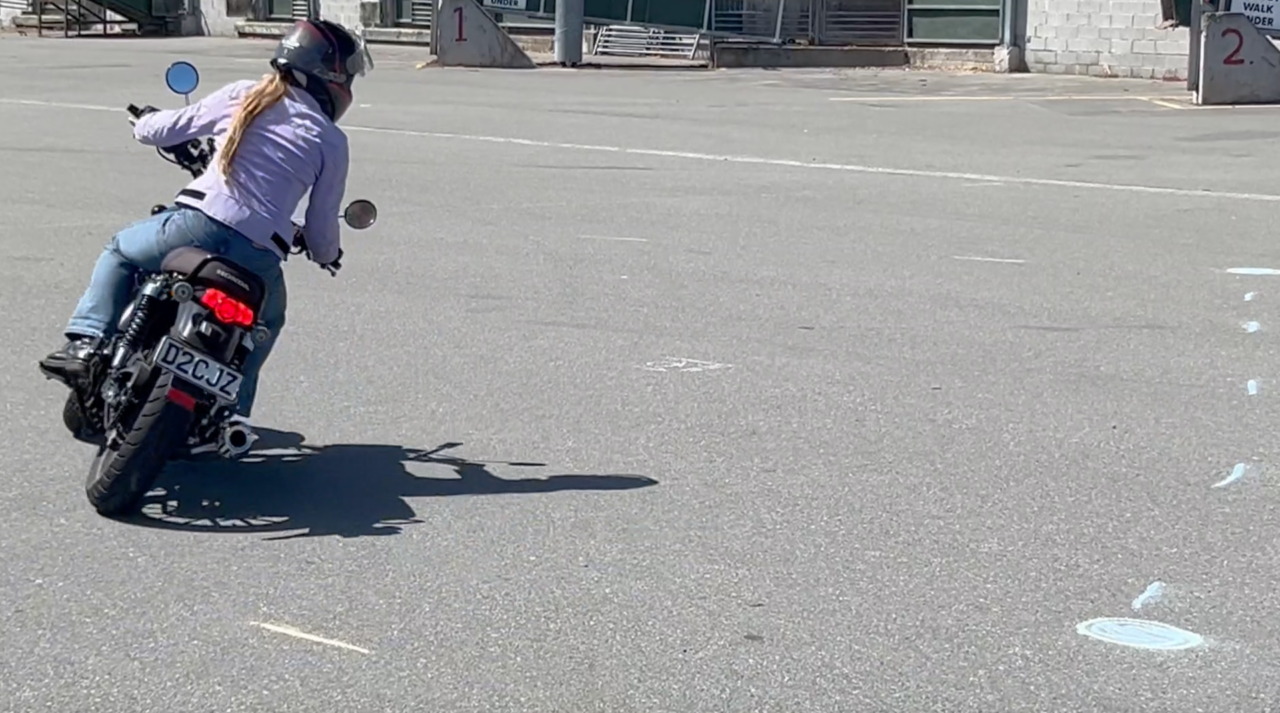
Looking ahead is not looking down at the motorcycle front wheel, rather, you need to be looking up and be looking at the area you need to ride to.
In a corner, this could be as much as 45-90 degrees of head turn needed depending on the manoeuvre or tightness of the turn needed.
Looking up and ahead to where you need to travel also solves many rider issues including overcoming target fixation for new riders. (Staring at vehicles not in path of travel, road side objects, general distractions etc)
5e Supplementary, using the back brake
Add some back brake when turning with your right foot control.
Example
- Enter a u-turn at your chosen speed and keep your throttle position as-is;
- Add a little back brake with smooth throttle control. The motorcycle will turn and slow a little without feeling "tippy" - Do not chop or roll off the throttle during the manoeuvre;
- Release the back brake after the corner is completed, no need to add more throttle as the bike will speed up without the back brake applied.
This really helps with stability when needing to turn at low speeds.
The turn will become smoother and the motorcycle will hold its turn better, a very stable way to turn when using the back brake combined with smooth throttle control.
No feeling of unstable, "tippy" or wiggly when the real slow speeds are needed for the smaller turns.
The same applies for circles, add a little back brake with smooth throttle applied and the circle will be easier to control.
Never roll off the throttle completely to slow down in turning manoeuvres
Instead, use the back brake to smooth out the turn with smooth throttle control while learning to ride.
Note: Never stomp your rear brake lever, always be smooth and add brake pressure.
Unlike a car with four (4) wheels, we can take advantage of the separate front and rear brake functions that motorcycle has to be smooth on two wheels - That is what keeps riders in contact with the road surface, being smooth with the controls!
6. Using gearbox, changing gears
At this point you should be able to start and stop a motorcycle using 1st gear using engine power, and be using the clutch in a co-ordinated manner.
You can practice using gears on longer straights as you will need room as changing gears implies more speed is applied.
Change the gear, then release the clutch the same way you learned to start using the clutch, smooth and slow.
Example
Rolling forward in 1st gear, bring in clutch lever and roll off throttle, using your left foot, use gear lever and click it up to 2nd gear, then release clutch lever slowly and add throttle slowly. Repeat for additional gears and speed zones.
Note that if you attempt corners in a faster speed zone ie using second or third gear your turning radius will be wider as a result of traveling faster.
This why when turning, you set your speed before any corner or manoeuvre.
As you get better with practice you will be able to change down to 1st gear just before you come to a complete stop.